Project Sewn - Craft, Sewing, Embroidery, Tips & Tricks, Product Reviews
Top 15 Best Sewing Machine Under $300 Reviews 2023
Finding the best sewing machine under $300 can be hard. Today, I will review 15 of…
Top 15 Best Sewing Machine Under $200 Reviews 2023
There’s a wide selection of sewing machines you can choose from in 2023. However, choosing the…
Top 15 Best Sewing Machine Under $500 in 2023
These days, you can find different types of high-quality sewing machines under $500. They cost less…
Top 15 Best Sublimation Ink To Buy 2023
The best sublimation ink has low viscosity and doesn’t clog your unit’s tubes and small parts…
Top 15 Best Longarm Quilting Machine Reviews 2023
The best longarm quilting machine is every passionate quilter’s dream machine. Although longarm units cost a…
Brother LS2125i Portable Sewing Machine Review
If you’re a passionate beginner in the sewing practice or someone who just needs to do…
Top 15 Best Sewing Machine Lights To Buy 2023
If you’ve been doing some sewing for a while, it’s no doubt that you’ve experienced some…
Top 11 Best Walking Foot Sewing Machine Reviews 2023
If you are a new sewist, the concept of a walking foot is quite alien, and…
Top 11 Best Walking Foot Sewing Machine Reviews 2023Read More
Top 10 Best Embroidery Machines for Hats To Buy 2023
Not only baby boomers but also millennials are obsessed with embroidered hats. For a long time,…
Top 10 Best Embroidery Machines for Hats To Buy 2023Read More
Top 15 Best Sewing Machine Oil To Buy 2023
You may think of oiling your sewing machines as a challenging task, but it’s quite straightforward.…
Top 12 Best Brother Sewing Machine To Buy 2023
To sew or not so sew? It’s a common question to anyone while confronting a hole…
Top 12 Best Bernina Sewing Machine Reviews 2023
Sometimes while repairing old clothes, have you ever come up with ideas for designing unique items…
Top 15 Best Sergers for Beginners To Buy 2023
For many people, a serger is an outlandish concept. I have met a lot of sewing…
Top 12 Best Mini Sewing Machine To Buy 2023
I know a lot of you love sewing. Have you ever dreamed of having a sewing…
Top 15 Best Sewing Machines for Quilting To Buy 2023
For most of us, quilting is an activity we’ve decided to take up for leisure or…
Top 15 Best Sewing Machines for Quilting To Buy 2023Read More
Top 15 Best Sewing Kit To Buy in 2023
Why Do You Need to Buy a Sewing Kit? The choice to buy each product needs…

Top 15 Best Sewing Machine for Advanced Sewers in 2023
You have been sewing many lovely small items for yourself and people around you for a…
Top 15 Best Sewing Machine for Advanced Sewers in 2023Read More
Top 12 Best Sewing Machine for Denim in 2023
It can be the case for beginners to start searching for an approximate sewing machine. Imagine…

Top 15 Best Embroidery Hoops To Buy 2023
Every embroiderer’s goal is to create a beautiful neat piece of art on the canvas. But…
Top 15 Best Screen Printing Machine Reviews 2023
What Is a Screen Printing Machine? A screen printing machine is a machine that allows you…
Top 15 Best Sewing Machine for Upholstery Reviews 2023
No matter which demands motivate you to find a heavy-duty machine, I believe that my reviews…
Top 15 Best Sewing Machine for Upholstery Reviews 2023Read More
Top 15 Best Sublimation Printers To Buy 2023
You do the jobs related to printing and image processing and want to buy yourself a…
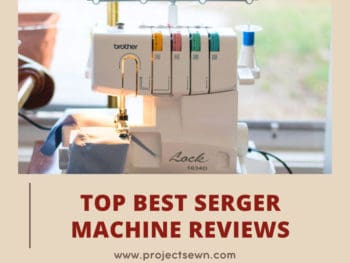
Top 15 Best Serger Machine Reviews 2023
Having an interest in clothing sewing and cutting work, do you realize how the garment industry…
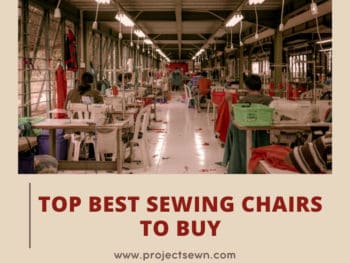
Top 15 Best Sewing Chairs To Buy 2023
Any sewer knows that sitting down for many hours to sew will undoubtedly result in fatigued…

Top 15 Best Dress Form To Buy 2023
Have you ever been overwhelmed with thousands of dress form models on the market and have…

Top 15 Best Embroidery Scissors Reviews in 2023
Embroidery is making art. You don’t want to waste time and money on a bunch of…
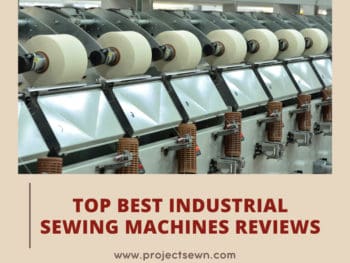
Top 15 Best Industrial Sewing Machines Reviews 2023
You are sewing a large number of high-performance items. So, what tools are you utilizing to…
Top 15 Best Industrial Sewing Machines Reviews 2023Read More
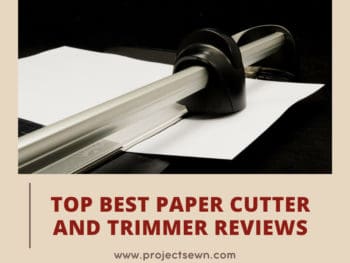
Top 15 Best Paper Cutter and Trimmer Reviews 2023
If you think there’s no way such a simple tool can affect your work, remember when…
Top 12 Best Embroidery Threads To Buy 2023
One of the most critical factors that contribute significantly to the embroidery process is the quality…
Top 13 Best Computerized Sewing Machine Reviews 2023
With the development of technology, many tools have been upgraded to make the task less daunting…
Top 13 Best Computerized Sewing Machine Reviews 2023Read More
Top 15 Best Sewing Machine For Intermediate Sewers 2023
In modern society, it’s obvious we usually buy available clothes from local stores, clothing outlets, or…
Top 15 Best Sewing Machine For Intermediate Sewers 2023Read More
Top 15 Best Sewing Scissors Reviews in 2023
Whether you are a beginner or a professional sewer, high-quality scissors are indispensable in your toolbox.…
Top 12 Best Sewing Thread To Buy 2023
Sewing thread, in addition to meeting the requirements of certainty, also must complete many aesthetics to…

Top 13 Best Mechanical Sewing Machine To Buy 2023
“Sewing machine” – A specialized sewing support device for fabric details, clothing, machine lines designed with…
Top 12 Best Sewing Machine Under $100 on the Market 2023
When it comes to sewing, we can relate to many of its roles and properties. Sometimes…
Top 12 Best Sewing Machine Under $100 on the Market 2023Read More
Top 12 Best Sewing Machine for Kids Reviews 2023
The art of needlework is quickly lost. Children turn on their smartphones and do not like…

Top 12 Best Embroidery Machines Reviews 2023
Do you love sewing? Do you love embroidery? Now you can stitch your idea using one…
The 11 Best Juki Sewing Machine Reviews 2023
Are you on the hunt for a new sewing machine? If you haven’t heard of the…
The 13 Best Janome Sewing Machine Reviews 2023
If you are looking for a new sewing machine, you’ve probably come across your fair share…
Top 16 Best Embroidery Software Reviews 2023
Creativity should have no boundaries and embroidery is one of the best ways to allow creativity…

Top 10 Best Commercial Embroidery Machine Reviews 2023
So you just made all the steps to opening your own big embroidery shop or your…
Top 10 Best Commercial Embroidery Machine Reviews 2023Read More
Top 12 Best Sewing Machines for Making Clothes 2023
So, you have already learned how to cut your own clothes and feel enough confident to…
Top 12 Best Sewing Machines for Making Clothes 2023Read More
Top 12 Best Coverstitch Machine Reviews 2023
Stretch fabrics or knits can be real trouble when trying to sew them. This process is…
11 Best Heavy Duty Sewing Machine Reviews 2023
Dreaming to make a change to those favorite jeans but it’s too hard sewing the thicker…
Top 10 Best Embroidery Machines for Home Business 2023
Embroideries will never go out of fashion. However, getting the nicest monograms requires a good quality…
Top 10 Best Embroidery Machines for Home Business 2023Read More
Top 14 Best Singer Sewing Machine Reviews 2023
You can’t be into sewing if you haven’t heard of Singer sewing machines. They are truly…
Join Our Newsletter
Sign up now to get all of our trending posts, tips and tricks right to your inbox!
Blog

Best Quilting Tutorials for Beginners 2023
The best quilting tutorials for beginners can help newcomers overcome their fear of quilting and finish a project successfully. If you’re a quilting beginner, don’t worry! I have your back. Today, I…